Welcome to the ultimate guide to Zendesk HubSpot Integration that you will not find in a single document anywhere online. We know that you are too busy to afford extra time in researching the same. Even if you do, trust us, you will surely get lost among multiple windows and documents. It is all too many to take in at a glance.
Just spend your next 10 mins in reading this article thoroughly to perform this integration with ease. For this reason, we are giving you a meticulous step-by-step guide attached with supporting images.
Zendesk HubSpot Integration
As you know both Zendesk and HubSpot are CRM softwares used in customer services. eCommerce business people like you create and manage customer and company data on these platforms.
This particular integration is also used for similar purposes. Let us see the benefits of this integration to understand it better.
Also, read Zendesk Review – Pricing, Features, Reviews
Table of contents:
- Benefits Of Zendesk HubSpot Integration
- Types Of Zendesk HubSpot Integration
- Easy Steps To Integrate Zendesk And HubSpot – One-way Sync
- Easy Steps To Integrate Zendesk And HubSpot – Two-way Sync
- Setbacks Of Zendesk And HubSpot Integration – One-way Sync
- Setbacks Of Zendesk And HubSpot Integration – Two-way Sync
- Meet Saufter The Best Zendesk Alternative
Benefits Of Zendesk HubSpot Integration
- Transfer customer and company data easily between these two helpdesk softwares.
- Merge and manage tickets, conversations, etc from either of the platforms at a time. Because data synchronizes automatically among them post-integration.
- Choose to work on whichever interface provides you with the required field data according to your business needs.
Before heading to the step-by-step instructional guide, you should learn about the types of Zendesk HubSpot integration. Understanding these types is very basic and pretty important at the same time. Why because depending on the outcomes, you will be able to decide which type of integration you should perform.
Types Of Zendesk HubSpot Integration
Zendesk can be connected with HubSpot in two different ways:-
As the name denotes, you transfer data in a single direction, that is from Zendesk to HubSpot only. It is neither possible to edit any data on HubSpot nor move it back to Zendesk.
Zendesk designed this direct integration and so it carries another name “Native Integration”. This integration lets you view Zendesk ticket data in HubSpot’s customer profile timeline.

When you check your HubSpot account after the completion of the process, you can view three types of tickets displayed:
- Newly created tickets
- Closed tickets
- Solved tickets with CSAT scores
Transfer data between Zendesk and HubSpot in both directions using this integration. It automatically syncs Zendesk customers’ and companies’ data seamlessly without missing any entries. All data transfers happen in real-time.
Once you set up this integration, you will be surprised to find default field mapping is already done. Along with historical data, the existing ones also synchronize right away. Even the updates will happen on their own, right away.

With that, we have discovered the types of integrations. We hope now you know which method meets your requirement. Shall move on to the steps guide for both types without further ado.
Easy Steps To Integrate Zendesk And HubSpot – One-way Sync
Here, data is shared only from Zendesk to HubSpot and not vice versa. As mentioned above, after performing this integration, you will be able to view all the ticket information and the current CSAT related to your Zendesk customers in your HubSpot window.
Step 1) First, visit https://hubspot.zendesk-integrations.com/zendesk. Enter your Zendesk subdomain in the box and push the “Authorize” button.

Please note: In case you don’t possess a Zendesk support account yet, you can create one by clicking on “Register for free” in this window.
Step 2) If you are not logged in, the screen will prompt you to enter your Zendesk credentials. Go ahead and key in the details.
Step 3) Authorize Zendesk on the next screen to access your account data.
Step 4) Open your HubSpot account and click on “Contacts”.

Step 5) Choose any contact and click on the “Filter activity” drop-down button.

Step 6) And finally, scroll down and check the “Zendesk” checkbox.

You are done with the one-way sync integration steps now. This automatically creates three triggers and one target immediately after integration. These triggers ensure the tickets’ data transfer to your HubSpot whenever they are made, closed, or rated.
Also read: How to Add Ticket Types To Zendesk
Easy Steps To Integrate Zendesk And HubSpot – Two-way Sync
When you integrate Zendesk with HubSpot using the two-way sync method, as we discussed earlier, you will be able to share data both ways and in real-time.
Prerequisites Before The Integration
- To perform this integration, you should be subscribed to either the Zendesk Team plan or the Zendesk Professional plan.
- Similarly, you must hold HubSpot Super Admin rights or HubSpot App Marketplace permissions in your HubSpot account.
- Log in to your Zendesk account.
Did you meet these three criteria? Then, you can move ahead to the steps. We are adding a video tutorial too for your easy reference. Nevertheless, we counsel you to go through the detailed step-by-step guide that follows the video.
Step #1 Navigate to HubSpot Marketplace. Choose Zendesk and click on the “Sign in to install the app” button on the top right of the window.

Step #2 Enter your Zendesk subdomain and authorize. Now both of your accounts are linked.
Step #3 Next step is to configure your app settings. To do so, go to your Hubspot account and select the Marketplace icon on the main navigation bar.
Step #4 Find “Manage” and click on it to choose “Connected apps”.
Step #5 Select “Zendesk” and push the “Set up your sync” button.

Step #6 “Choose an object to sync” page pops up now. Pick the object you want to sync and select “Next”.

Step #7 You will be redirected to the “Configure” screen. Here, you need to configure your sync direction. There are 3 different options to choose from,
- Data sync between apps – choosing this will sync all the new and updated object information between HubSpot and Zendesk. The properties of existing records will be merged on both platforms.
- Data sync only to HubSpot from Zendesk.
- Data sync only to Zendesk from HubSpot.
Step #8 Look out for the “Resolve data conflicts” section and tap the drop-down menu to choose “Default to HubSpot”. This step overwrites the other app only in case of any data discrepancy.

Step #9 Review your field mappings in the “Map your fields” section. The toggle button will be on for all default property mappings. Turn this off if you wish to disable the default mapping for any property.
Step #10 Pay attention to this step. If you want to do custom mapping for any property, it is possible only if you are subscribed to Operations Hub. Giving you the steps to do this, below.
- Click on “Add new mapping”.
- Choose “Zendesk” from the drop-down menu and the HubSpot property to map.
- Tap the tick mark to update.

We are covering the complete setup for your convenience. So continue to pay attention to further steps too.
Step #11 Define your sync rules on the “Limit” screen concerning email address, name, and domain. You can also choose the criteria to limit which records to sync from Hubspot to Zendesk and in reverse.
Step #12 To maintain the same associations between records (for example companies associated with contacts),
- Click on the “Actions” dropdown menu of the object and choose “Edit sync settings”.
- Press “Configure”.
- Tap the “All mappings” dropdown found in the “Map your fields” section.
- Now select “Association mappings”. This syncs the record associated with the object.
- Note that the primary company alone syncs even if a record has multiple company associations. You may also refer here.
Step #13 This is the last leg of the setup. Review all the rules that you have set so far in the “Review and sync” screen and push the “Save and sync” button to initiate synchronization.

Please note: The whole sync process may run for about 10 minutes.
Exhausted? Hang on a bit more to find an easy option. The best is always saved for the last. For now, we would like to quickly take you through certain challenges you may face with these integrations. All these were voiced by the users themselves on review sites.
Setbacks Of Zendesk And HubSpot Integration – One-way Sync
- Post integration you will be only able to view the ticket information in the timeline. For that too, you must manually add this view to the filter activity. Otherwise, you cannot see the information.
- It is absolutely not possible to edit or sync any of the ticket data that you transferred from Zendesk to HubSpot on HubSpot, as this is clearly a “one-way sync”.
User Reviews
“The ticket data integration is nice to have. However, the integration is not configurable in any way. New contacts are created with a HubSpot lifecycle stage to “Lead”. This interferes with lead reporting in HubSpot.”
“It is one way FROM Zendesk to HubSpot and you can’t edit the tickets in HubSpot. So it is limited.”
“Zendesk integrations do not seem to work well, there is always some problem with access.”
Setbacks Of Zendesk And HubSpot Integration – Two-way Sync
- Ticket synchronization does not happen in this type of integration. For this, you need to follow the one-way Zendesk native integration.
- Only default mappings are possible with this integration. In case you want to change any of these or create your own, then you will have to follow the custom-field mapping method.
- Since default mapping is automatic in this method, you will find all the contacts and organizations’ data synced to HubSpot/Zendesk. Sometimes you may not need all of them. But it is not possible to customize or modify the field mapping.
- If custom field mapping is a requisite for you, then you need to use Operations Hub to perform the same.
- This task requires you to be subscribed to premium plans – Zendesk Team/Professional.
User Reviews
“Not enough documentation, not enough customization. The setup is easy but does not allow any changes.”
“Bad integration. I had hoped to port over the helpdesk experience to HS completely, so I signed up. Blew through three months of trying to figure it out and finally had to manually transition all articles into HubSpot.”
“I would like to integrate more than one thing and not only create a list of x. I would love to be able to write tags in HubSpot and see them reflected in Zendesk or be able to generate tasks in Zendesk if something happened in HubSpot.”
“From my point of view the worst part is making sure that the client interactions we have on Zendesk are recorded on HubSpot, i.e. if I reply to a user request in Zendesk and the visitor was authenticated in Zendesk, the email conversation from that ticket should be recorded on their HubSpot email history. I am sure there is a way to do this, but figuring out the steps to get this very basic thing to work is just very tedious.”
Also read: Best Zendesk Support Suite Alternatives You Need To Know!
Meet Saufter, The Best Zendesk Alternative
Saufter is an all-in-one eCommerce support software to delight your customers by providing the best support experience. With this software, you can reduce your manual efforts by up to 50% without compromising on your service quality. Read the key features below to learn more.
Key Features Of Saufter
- CRM Integrations – Saufter connects with other helpdesks like Gorgias, Freshdesk, etc easily with just a few clicks. No long technical steps are involved or coding skills are required.
- eCommerce integrations – Connect with Shopify, Magento, and WooCommerce stores with a single click.
- Native integrations with email, live chat, phone, and social media to streamline and elevate omnichannel customer support.
- Social platforms – You can easily extend support on Facebook, Instagram, WhatsApp, Twitter, etc right from Saufter dashboard.
Not just integrations, it helps you automate most of your eCommerce support tasks.
5. Automated responses help you engage your customers using AI-suggested replies.
6. Seamless Ticketing system manages all your customer tickets tasks like creating, assigning, organizing, and closing on auto-pilot mode.
7. Organizes all the customer-related context in one single window for your agents to provide support with full knowledge.
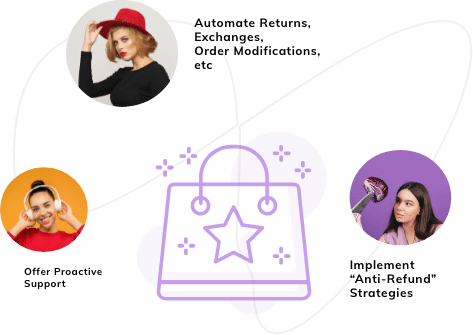
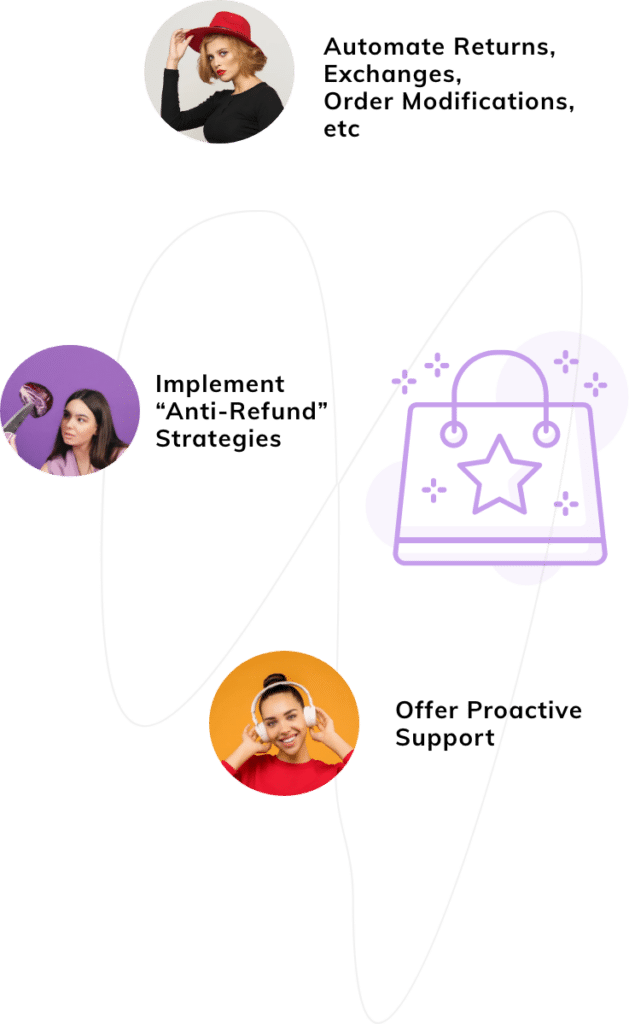
8. Order management – Monitors all your orders 24/7 and detects any shipping delays/issues automatically and notifies you to offer proactive customer support.
9. Returns/exchange automation – Lets your customers initiate returns/exchanges or even modify orders from a branded self-portal.
10. Marketing automation – Auto-prompts attractive deals/discounts to reduce returns rate. Collects positive reviews (UGC) automatically to showcase as your social proof and increase sales conversions.
11. Training automation – Saufter provides you unique AI-integrated training tool to train and test your support agents’ efficiency.
12. Marketplace – Hire category specialized support agents from them in a click.
13. Analytics – Comprehensive reports help you monitor your teams’ performances in real time.
Also read: Zendesk vs Saufter Comparison.
Conclusion
Now that you are here, we are sure, you might have got a thorough understanding of the Zendesk and HubSpot integration. Once again, we proudly inform you that you may have to save this document. As you can see, many users have found it pretty tough and some even gave up performing this integration without proper guidance.
To be honest, the steps were too complicated and tedious even with this guide. Don’t you agree? And that’s why simply click on Saufter to do all the necessary integrations with easy clicks. Plus all the other exciting customer support features that we just discussed above.
No other helpdesk offers you the best-automated customer service solutions out there. Even more, you can find and collaborate with Influencers to expand your customer base effortlessly. We are sure you can’t wait to try all these.